Service enrollment
“Enrolling” means acquiring a RADKit Cloud identity and certificate for your RADKit Service. Without this step, RADKit Service can only receive connections locally (“direct connect”).
This page describes various ways that you can enroll your RADKit Service. If this looks overwhelming, check out the Quick start guide for a simple setup procedure.
Note
THIS PAGE IS A WORK IN PROGRESS
This page is being updated. The content below is from a previous release and may not be 100% accurate. Thank you for bearing with us while we update the documentation.
Using the WebUI
After logging in as superadmin, you are taken to the “Connectivity” screen:
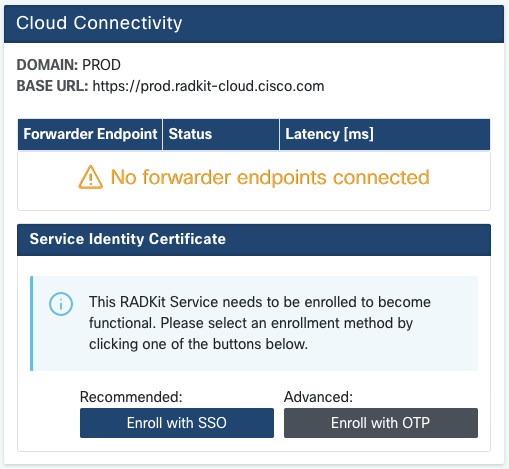
Now you need to enroll the service. You have two options for that: by logging in to Cisco SSO, or by providing a one-time password generated through an authenticated RADKit Client.
Single Sign-On (SSO) enrollment
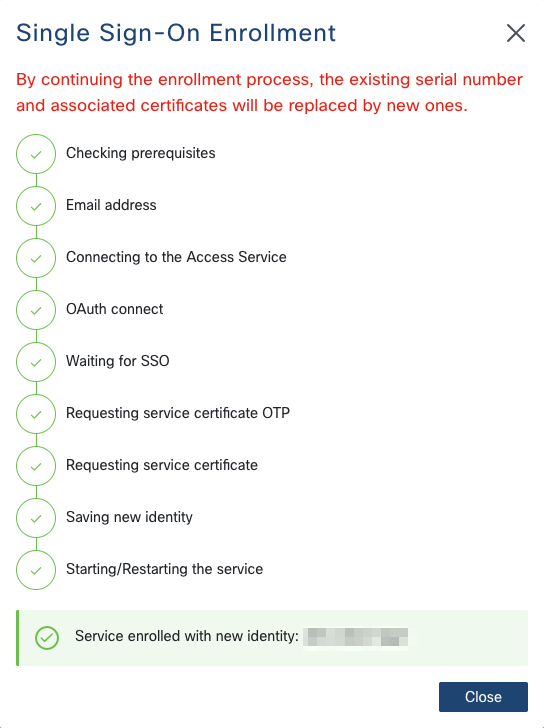
If you have a valid Cisco.com account, you can use SSO to enroll the Service by clicking the “Service Enrollment -> Single Sign-On” and following the wizard:
Note
In order for SSO enrollment to work, you need the following network connectivity:
the host running RADKit Service must have access to the RADKit Cloud;
the host running the web browser must have access to the RADKit Cloud and Cisco SSO.
After successfully completing the enrollment procedure you will see that the “Cloud Information” section is populated with details about the Service’s new identity certificate, as issued by the RADKit CA:
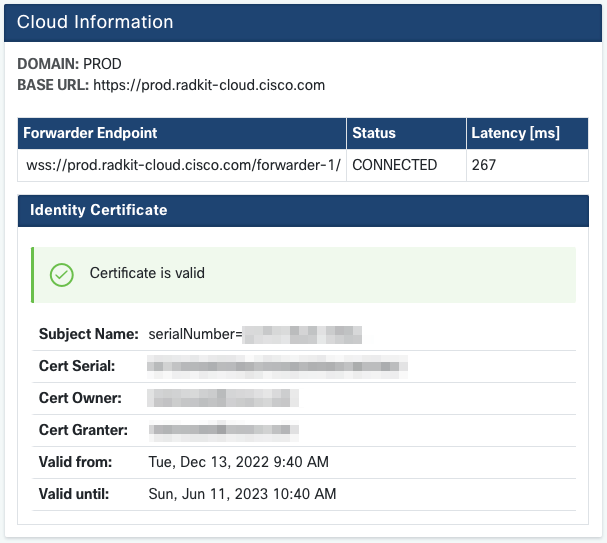
You can now finish setting up the Service by adding devices and remote users. You can also connect to the Service WebUI from a different host and manage it remotely if needed.
One-Time Password (OTP) enrollment
Note
This method is only for specific/advanced deployment scenarios, and for the vast majority of use cases, you should use SSO enrollment instead (see above).
First you need a one-time password (OTP) generated by a RADKit user who has access to an
authenticated RADKit Client. You can generate this OTP yourself, if needed, using the
client.grant_service_otp()
method in the Client (see API reference for details).
Click “Service Enrollment -> One-Time Password” and enter the OTP as it is given to you, then wait for the enrollment to finish (this may take a few seconds to complete):
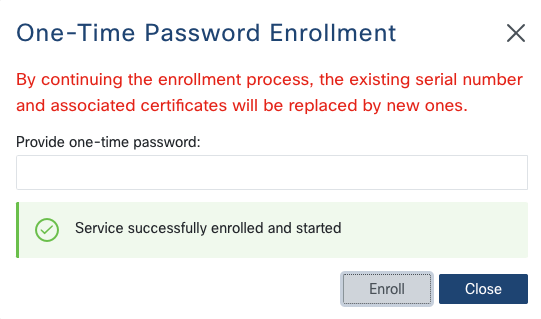
You can now finish setting up the Service by adding devices and remote users. You can also connect to the Service WebUI from a different host and manage it remotely if needed.
Using the command line
After creating the superadmin account, you need to enroll the service. When enrolling through
the CLI, you need a one-time password (OTP) generated by a RADKit user who has access to an
authenticated RADKit Client. You can generate this OTP yourself, if needed, using the
client.grant_service_otp()
method in the Client (see API reference for details).
ServiceEnrollInfo(email='myuserid@cisco.com', serial='xxxx-yyyy-zzzz', otp='1111-2222-3333', domain_name='PROD')

-----------  ------------------
email        myuserid@cisco.com
serial       xxxx-yyyy-zzzz
otp          1111-2222-3333
domain_name  PROD
-----------  ------------------

To enroll a Service using this OTP:
  radkit-service enroll PROD:1111-2222-3333
  OR enter PROD:1111-2222-3333 in the WebUI under Connectivity > Service Enrollment > One-Time Password
Run the command radkit-service enroll as instructed (or use the one shown above as a template),
provide the superadmin password when asked, and wait for the enrollment to finish (this may
take a few seconds to complete):
% radkit-service enroll PROD:1111-2222-3333
Superadmin password: ********   [correct]
Enrollment successful.
Now run the following command to start the service:
    radkit-service --domain PROD run
After enrolling, start the Service (in this example we can omit PROD as it is the
default domain):
% radkit-service run
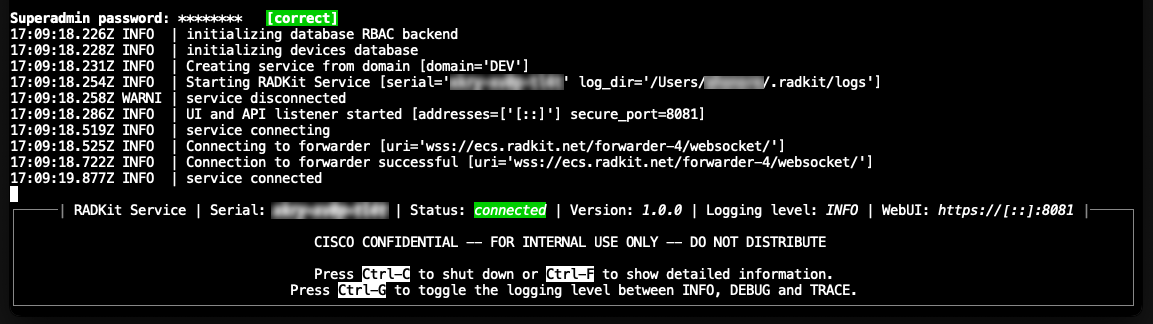
Finally, head to https://localhost:8081 (or the URL mentioned in the frame displayed in the
terminal) with your web browser, log in as superadmin, and finish setting up the Service
by adding devices and remote users. You can also connect to the Service WebUI from a different
host.
Using REST API
For automation or programmatic enrollment, you can use the RADKit Service REST API. This method requires a one-time password (OTP) generated by a RADKit user who has access to an authenticated RADKit Client, similar to the command line enrollment method.
Note
This method is primarily intended for automation scenarios and advanced use cases. For most interactive scenarios, use the WebUI with SSO enrollment instead.
Prerequisites
Before using the REST API for enrollment, ensure you have:
A one-time password (OTP) generated using a RADKit Client
Access to the Service’s REST API endpoint
Valid
superadmincredentials for authentication
Generating the OTP
Option 1: RADKit Client - Use the client.grant_service_otp() method after SSO login.
Option 2: Public API - For automation, use the /public/otp/certificate endpoint (see Access API user guide).
Use tagged identities with “+” syntax (e.g., automation+customer-a@cisco.com) for multi-customer scenarios.
API Endpoint
The enrollment API endpoint is:
POST /api/v1/connectivity/cloud/enroll
Request Format
Send a POST request with JSON payload:
{
  "one_time_password": "DOMAIN_NAME:OTP_VALUE"
}
Complete Automation Example
# Get token, generate OTP, and enroll service
ACCESS_TOKEN=$(curl -s -X POST '{{baseURL}}/oauth2/token?grant_type=client_credentials' \
  -H 'Authorization: Basic {base64(client_id:client_secret)}' | jq -r '.access_token')

OTP=$(curl -s -X POST '{{baseURL}}/public/otp/certificate' \
  -H "Authorization: Bearer $ACCESS_TOKEN" -H 'Content-Type: application/json' \
  -d '{"owner": "automation+customer-a@cisco.com", "endpoint_id": "customer-a-service-001", "description": "Production service"}' | jq -r '.otp')

curl -X POST https://localhost:8081/api/v1/connectivity/cloud/enroll \
  -H 'Content-Type: application/json' -u 'superadmin:password' \
  -d "{\"one_time_password\": \"PROD:$OTP\"}"
Simple Examples
cURL:
curl -X POST https://localhost:8081/api/v1/connectivity/cloud/enroll \
  -H 'Content-Type: application/json' -u 'superadmin:password' \
  -d '{"one_time_password": "PROD:1111-2222-3333"}'
Python:
import requests
response = requests.post(
    "https://localhost:8081/api/v1/connectivity/cloud/enroll",
    json={"one_time_password": "PROD:1111-2222-3333"},
    auth=("superadmin", "password"), verify=False)
print("Success" if response.status_code == 200 else f"Error: {response.text}")
Response Format
On successful enrollment, the API returns:
{
  "success": true,
  "result": "Service successfully enrolled and started"
}
On failure, the API returns an error response with details about what went wrong.
Error Handling
Common error scenarios include:
Invalid OTP: The OTP has expired or is incorrect
Network connectivity: The Service cannot reach the RADKit Cloud
Authentication: Invalid superadmin credentials
Domain mismatch: The OTP is for a different domain than expected
Automation with Tagged Identities
For multi-customer automation, use email aliasing (automation+customer@cisco.com) to:
Associate services with specific customer identities
Maintain clear audit trails and access control
Enable organizational separation
See ../pages/access_public_api for tagged client ID details and examples.
After successful enrollment, the Service will be connected to the RADKit Cloud and you can manage it remotely through the WebUI or continue using the REST API for device and user management.