Stand-alone Client scripts
The radkit_client package offers a variety of login functions at different
levels of abstraction. In this document, we’ll outline these login functions
and provide guidance on how to use them, starting with the easiest and
gradually diving deeper to more advanced and complex options.
When writing stand-alone Python scripts that use RADKit client as a library,
the most notable difference compared to the REPL is the manual instantiation of
the Client instance. So, if you have something
that works in the REPL, with this document, it should be possible to adjust it
for use in a stand-alone script.
When it comes to logging in, there are two things to be decided:
The connection type: Is the service reachable through a cloud-based connection; through a direct cloudless connection; or through an in-process integrated connection?
The authentication method: For cloud-based, we have SSO, certificate, and access token logins. There’s one login method for a direct connection, and one for starting an integrated connection.
Connection types
There are three distinct connection types corresponding to thee different client-service architectures.
Cloud-based: The service and client run anywhere and have internet connectivity. Both the service and client connect to the cloud and the cloud will bridge connections between client and service. For this to work, the service has to be enrolled with the cloud.
Direct: The client connects straight to an HTTP server running in the service. No cloud enrollment is needed.
Integrated: The service is started within the client process. There is no separate, persistent service process.
By default, when executing radkit-service run, the service will be reachable
through a direct connection, as well as through a cloud connection (if
enrolled). It’s possible to adjust this behavior using settings:
Creation of the Client instance
from radkit_client.sync import Client

with Client.create() as client:
    ...
Authentication methods
Depending on the connection type, we have to decide which authentication method to use.
For cloud based connections, the authentication is verified by the cloud. There are a few options:
SSO login.
Certificate login.
Access token login (using an OAuth bearer token).
Some examples:
with Client.create() as client:
    client.sso_login('user@domain.com')
    # client.certificate_login(...)
    # client.access_token_login(...)

    service = client.service_cloud('serial').wait()
    ...
For direct (cloudless) connections, we have to log in using a
username/password. The password can be passed to
service_direct(), but will be asked for if not
given.
with Client.create() as client:
    service = client.service_direct(
        'superadmin', host='service-address', port=8181
    )
    # For older services, that don't have a dedicated RPC socket yet, we
    # have to pass an `rpc_url`:
    service = client.service_direct(
        'superadmin', rpc_url='https://service-address:8081/rpc'
    )
It’s also possible to create a direct connection, but authenticate first using
SSO. In that case, we need to use sso_login()
first:
with Client.create() as client:
    client.sso_login('user@domain.com')
    service = client.service_direct_with_sso('serial')
Integrated mode does not require any authentication. The service is started on
the fly within the process of the client during the “login”. However,
create_service() requires an admin
password so that the integrated service can read the contents of the database
which contains the inventory.
with Client.create() as client:
    integrated_service = client.create_service(radkit_directory=...)
    service = integrated_service.service
Note
create_service() return an
IntegratedService class
which is an umbrella object that holds a reference to the Service, but also exposes other objects for managing
the service.
All of the login/connection functions are methods on a Client instance, so actually, in order to use them, we
have to create a RADKit Client instance
first.
from radkit_client.sync import Client

with Client.create() as client:
    client.sso_login('user@domain.com')
    service = client.service_cloud('serial').wait()
HTTP Proxy (Cloud-only)
If RADKit cloud is not accessible due to an HTTP proxy, you can specify the proxy in one of 2 ways:
Via the settings file (if using radkit-client): cloud_client.proxy.url
By passing the
radkit_client.sync.ProxyInfoto any of the login functions (except direct):
from radkit_client.sync import sso_login, ProxyInfo, Client

with Client.create() as client:
    client.sso_login(
        "email@example.com",
        proxy=ProxyInfo(url="http://proxy.example.com")
    )
In the REPL
In the REPL, the Client instance is
created automatically, and most methods and attributes of this client instance
are exposed directly as a Python global in the REPL. This means, in the REPL,
we can type: sso_login("email@example.com") instead of
client.sso_login("email@example.com").
Writing code, just like in the RADKit REPL
However, if you need to quickly copy and paste code that is working in the REPL
into a standalone script with minimal effort, then it’s important to type the
client.function() instead of function() notation in the REPL. Then the
code can be pasted in the following snippet to turn it into a standalone
script:
from radkit_client.sync import Client


def script(client: Client) -> None:
    # Paste here the code that you were running in the REPL.
    ...


def main() -> None:
    with Client.create() as client:
        script(client)


if __name__ == "__main__":
    main()
The above code will create a client in the main function in the same way as the REPL. This client can then be used to perform login operations and select services.
The creation of the Client requires the use of a
context manager so that
its resources (connections and information) will be released when the client
terminates.
from radkit_client.sync import Client

def _run_code(client: Client) -> None:
    # Ask for user input.
    email = input("email> ")
    domain = input("domain> ")
    service_serial = input("service serial> ")

    # Connect to the given service, using SSO login.
    client.sso_login(identity=email, domain=domain)
    service = client.service_cloud(service_serial).wait()
    print(service.inventory)


def main() -> None:
    with Client.create() as client:
        _run_code(client)


if __name__ == "__main__":
    main()
One advantage of this approach is that the main code is identical to what we
could have written in the REPL. The disadvantage here is that Client
instances live as long as the application lives. Usually that is fine because
one Client is typically sufficient, but it’s not recommended to keep many
Client instances open for extended periods of time, as they maintain an
active connection to the cloud and consume local resources (each Client
runs its own event loop thread).
In a Jupyter Notebook
Unfortunately, it is not possible to use a with construct to span multiple
input cells in a Jupyter Notebook. This makes it hard to manage the lifetime of
the client object. However, Python’s ExitStack makes it possible to open a
context manager, and keep it open across many Jupyter cells.
This RADKit Client instance remains open until the ExitStack is explicitly
closed using the stack.close() method:
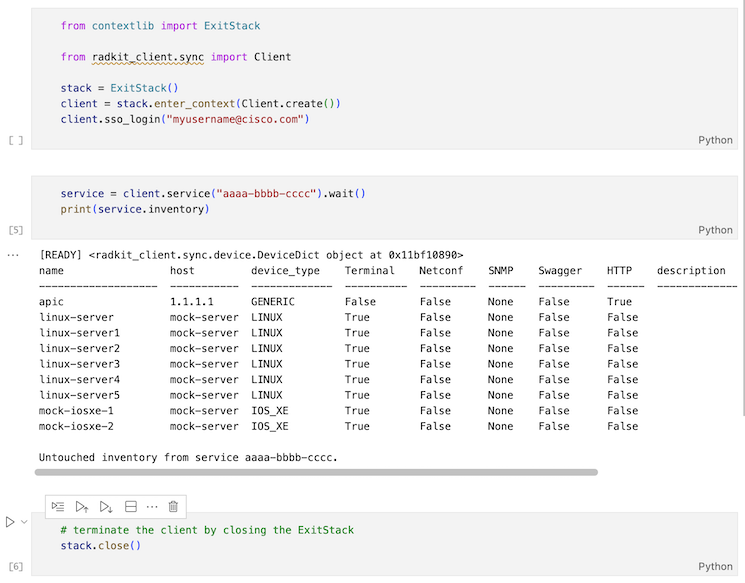
from contextlib import ExitStack
from radkit_client.sync import Client

# Create `ExitStack` and `Client`.
stack = ExitStack()
client = stack.enter_context(Client.create())

# Log in to domain.
client.sso_login(identity=..., domain=...)

# Now, use the `client` object (this may span multiple cells)
...

# Finally, at the end, terminate the client by closing the ExitStack.
stack.close()
Warning
Forgetting to call stack.close() at the end can possibly result in bugs:
It could cause the Python process to hang (because the background thread of a client isn’t terminated).
It could result in data loss, because ongoing RPC calls to a service aren’t properly flushed to the network, or data is not flushed to the disk.
Because of these issues, the use of a context manager (with ... as construct)
is recommended whenever possible. Context managers enforce a symmetry between
the creation of something and its teardown.
In a web application (e.g., FastAPI)
RADKit can also be integrated in Python web applications. However, if there is a need for a RADKit client to outlive one HTTP request, for instance because one HTTP request creates the client instance by logging in, and another HTTP request wants to reuse the same client, then things get complicated. It’s hard to wrap a context manager around multiple HTTP requests. In this case, it’s best to create a RADKit client in the main function.
If the application is an ASGI application, like FastAPI and runs with uvicorn then the main entry point can look like this:
import uvicorn
from radkit_client.sync import create_context, certificate_login # , ...

def main():
    with Client.create() as client:
        uvicorn.run(
            app,  # The ASGI (FastAPI) application. Should not be a string!
            host="0.0.0.0",
            port=8000,
            reload=False,  # Should be False!
        )
From there, client should be assigned to a global variable that can be accessed from anywhere.
There are two things here that are very important:
apphas to be passed as an object. Not as a string (so, not"api.main:app").reloadshould beFalse(so, notTrue).
The reason for this is that we want uvicorn to run the ASGI application in the current process, which is the process in which we created the context. If uvicorn would spawn a subprocess for the web server (which is needed for auto-reload), then this context is not propagated to that subprocess.
Important of course is also to start the web server by running this main()
function. Don’t start uvicorn at the command line.
For Hypercorn, which is a nice alternative for uvicorn, the same idea applies.
With the above setup, the contextmanager-less login functions can be used in any HTTP endpoint.
Using lifespan
FastAPI 0.94.0 and above supports lifespan handlers. This makes it possible to open the context manager within the lifespan handler. With this approach, it’s less important to “own” the entry point, although it’s still important to configure the ASGI runner (uvicorn/hypercorn/…) so that it doesn’t do multiprocessing.
from contextlib import asynccontextmanager
from fastapi import FastAPI

@asynccontextmanager
async def lifespan(app: FastAPI):
    # Create RADKit context for the duration of the application.
    with Client.create() as client:
        yield

app = FastAPI(lifespan=lifespan)
Also from here, client should be assigned to a global variable that can be accessed from anywhere.
The lifespan handler is always async, because it has to be. But the Client.create function, which is sync, will create a background thread with an event loop for the RADKit client(s), separate from the current event loop. This means that any RADKit client usage is sync, and no async HTTP endpoints should be used for interacting with this context.